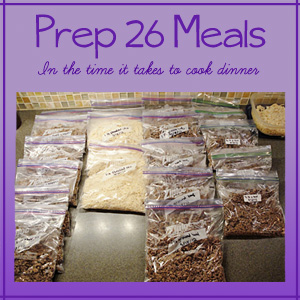
So the other day I shared my top 5 tips for freezer cooking and as promised I’m back to show you how I prepped 26 meals while I cooked dinner and cleaned the dishes. This big project focused on Step 2: Make Your Meals Speedy. Do you ever run into that dreaded feeling around 5 o’clock that you didn’t pull anything out to thaw and now dinner won’t be ready until the end of time when all you want to do is sit on the couch, drink some wine and watch some trash TV? I hope I’m not alone in those kind of days.
The best way to avoid those days is to cook your meat ahead of time. I don’t suggest cooking all meats ahead of time by any means but ground beef and chicken cuts are the perfect thing to prepare and have ready in a pinch.
Supplies
Pay close attention to these supplies as you plan your freezer cooking. You’ll be cooking several meats so save money by shopping the sales (rule 5) and visiting Costco (rule 4). I also had luck at my local Aldi store since you can’t beat their celery prices most days.
You’ll need:
- An empty dishwasher
- A clean stockpot
- A clean crockpot
- 10 pounds ground beef
- 1 stalk celery
- 9 chicken breasts
- Water, chicken broth, or a combination of the two
- Measuring cup
- Containers (I used Ziplock bags)
- Labeling tools (sharpie, address labels)
- Bonus: A kitchenaid mixer, a strainer, and a food processor
Preparation
The night before your cooking day, thaw some chicken breasts. Some people will stick frozen chicken breasts straight in a crockpot and while some modern crockpots may keep your food in a safe zone, it’s safer to put thawed chicken in your crockpot so that’s what we’ll be doing for this project.
About 4 hours before dinner, place your thawed chicken breasts in a crockpot. I have a small Rival crockpot so 9 chicken breasts fit about perfectly. This will vary based on the size of your crockpot and chicken pieces. You’ll want to fill the crockpot at least halfway with liquid. I like to pour in one can of chicken broth and fill the rest with water. Set your crockpot on high and cook about 4 hours.
Let the cooking begin!
I was making a long but hands off meal in the kitchen so I prepped my meal and my bulk cooking at the same time and finished assembling while dinner was in the oven.
The Beef
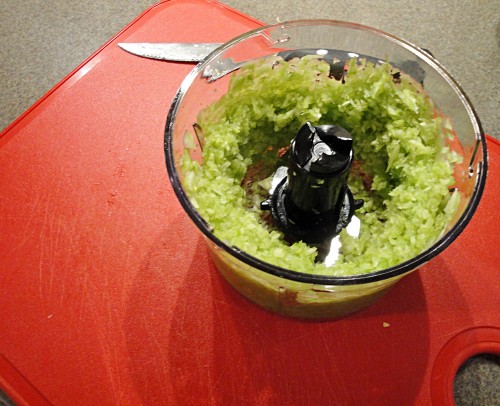
First, I chopped up the entire stalk of celery. Rather than waste time with a knife I just threw it in my food processor attachment and chopped it up very finely. I had two separate packs of ground beef I had gotten on sale so I chose the smaller pack (3.4 pounds) and threw it and the diced celery into the preheated stockpot on the stove. I use my Pampered Chef Mix n Chop to separate the beef, then I throw the lid on so the meat cooks faster. After about 10 minutes with some occasional stirring, all my meat was cooked and finely chopped. I poured the meat into a strainer to drain the fat and let it cool. While it was cooling I cooked the other 6.6 pounds of meat I had in the same method, sans celery. You can season these meat batches any way you want while cooking them.
The Chicken
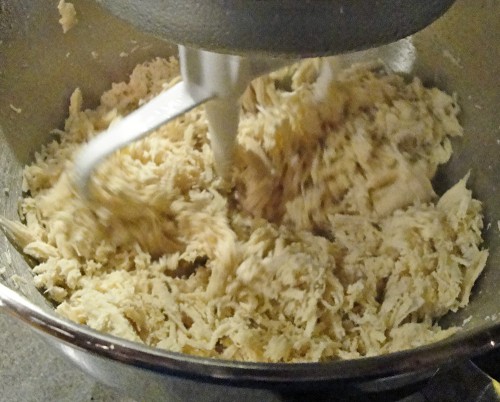
While the beef was cooking and dinner was still in the oven, I had strained my chicken of all the liquids. I then threw the chicken breasts into my Kitchenaid mixer with the batter blade attached and in seconds I had perfectly shredded chicken. I could easily chop the chicken by hand but remember, this is a speed run.
Packaging
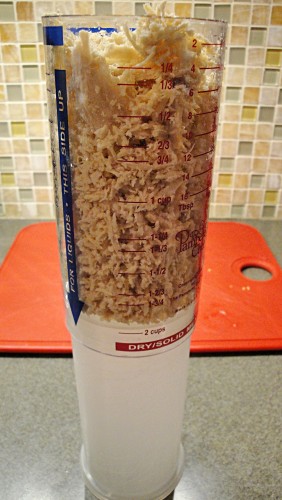
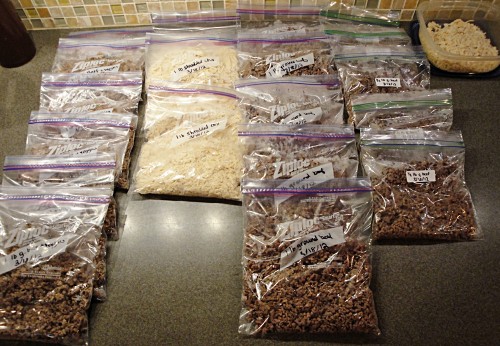
My dinner was nearing completion as I rushed to finish my last pre-dinner task. I used my handy Pampered Chef Measure-All Cup and set it for 2 cups. I had quart sized Ziplock bags* set aside and I filled each bag with 2 cups (1 lb) of whatever meat I had prepped. I threw an address label on some bags and wrote out what was in the bag (1 lb ground beef + veggies) and the date. I left all the bags open and on the counter to finish cooling (since steam=water=ice crystals=freezer burn) and I served up that night’s dinner while the cooling took place.
After dinner I came in, sealed the bags after squeezing out as much air as possible, and stacked them flat in my freezer. After frozen you can store the bags upright in a mail crate in your deep freeze. One person takes care of the bags while the other loads the dishwasher and you can still fit in your wine and TV time. With an outdoor tv mount, you can enjoy watching your favorite shows on your patio.
*Some people might freak out at Ziplock bags but here’s the deal: since you’re working with cooked meat you can reuse the bags and they take up the least amount of space in a freezer. Just cover up your old label with your new one each time you cook and you are good to go.
The Results
My chicken batch produced 7 1/2 cups of shredded chicken. This meant I had 3 bags plus a small container set aside for a lunch. I can thaw a bag of cooked chicken on the counter in 30 minutes, under hot water in 5 minutes, or it can go straight onto the stove. I use the shredded chicken for chicken salad, chicken pot pies, chicken burritos, or many other dishes. The chicken batch created 4 meals.
My ground beef mixed with celery started off as 3.4 pounds of meat but the vegetable added stretched it to 12 cups. I would have had 7 bags of meat but I cheated and used one bag’s worth of meat in that night’s dinner. I thaw it the same way as the chicken and I use the meat+veggie combo in tomato based dishes like sloppy joes and spaghetti. The ground beef plus veggies batch created 7 meals.
My plain ground beef batch started as 6.6 pounds of meat and created 25 cups of beef. I separated these into 10-2 cup batches that I’ll use for tacos and lasagna and 5-1 cup batches when I want a meal light on meat like ziti. The ground beef batch created 15 meals.
The average cost of my beef packs ended up at $1.40 per pack since my original 10 pounds of ground beef turned into 22 meals. I don’t remember the chicken price but I’ll take a look the next time I stop by Costco.
While I don’t have 26 complete meals on hand, I prepped ingredients so now none of the above recipes will take longer than boiling noodles. That’s a huge way to shave time off your cooking and with most of your prep work done on those meals, you’ll have more time to watch Game of Thrones or How I Met Your Mother.
Bonus
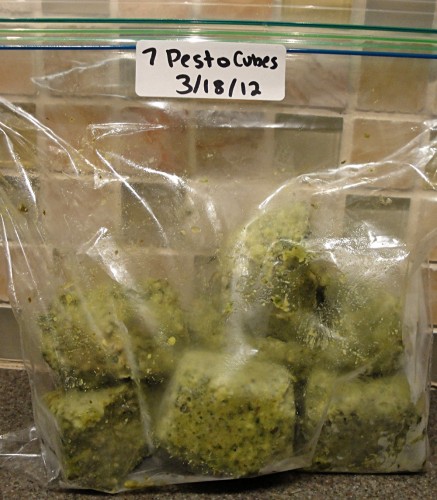
I had some Costco pesto in my fridge nearing the expiration date so the night before my cook day I threw it into ice cube trays and froze it. While I was bagging all my other goods I put the ice cubes into some bags and stored them back in my freezer. Now I have perfect servings of pesto for baked potatoes or pasta, I didn’t waste my goods and I followed rule 5: freeze seasonally. If you can fit all 5 freezing rules into one cook day, you know you’ve done well.

That was awesome – thank you!
Pingback: Chicken Pesto Skewers | The Hyper House
This does look awesome. (Any chance recipes might follow?)
Pingback: Top 10 Kitchen Tools | The Hyper House